hasselblad 500cm

A few frames - 03.11.2022

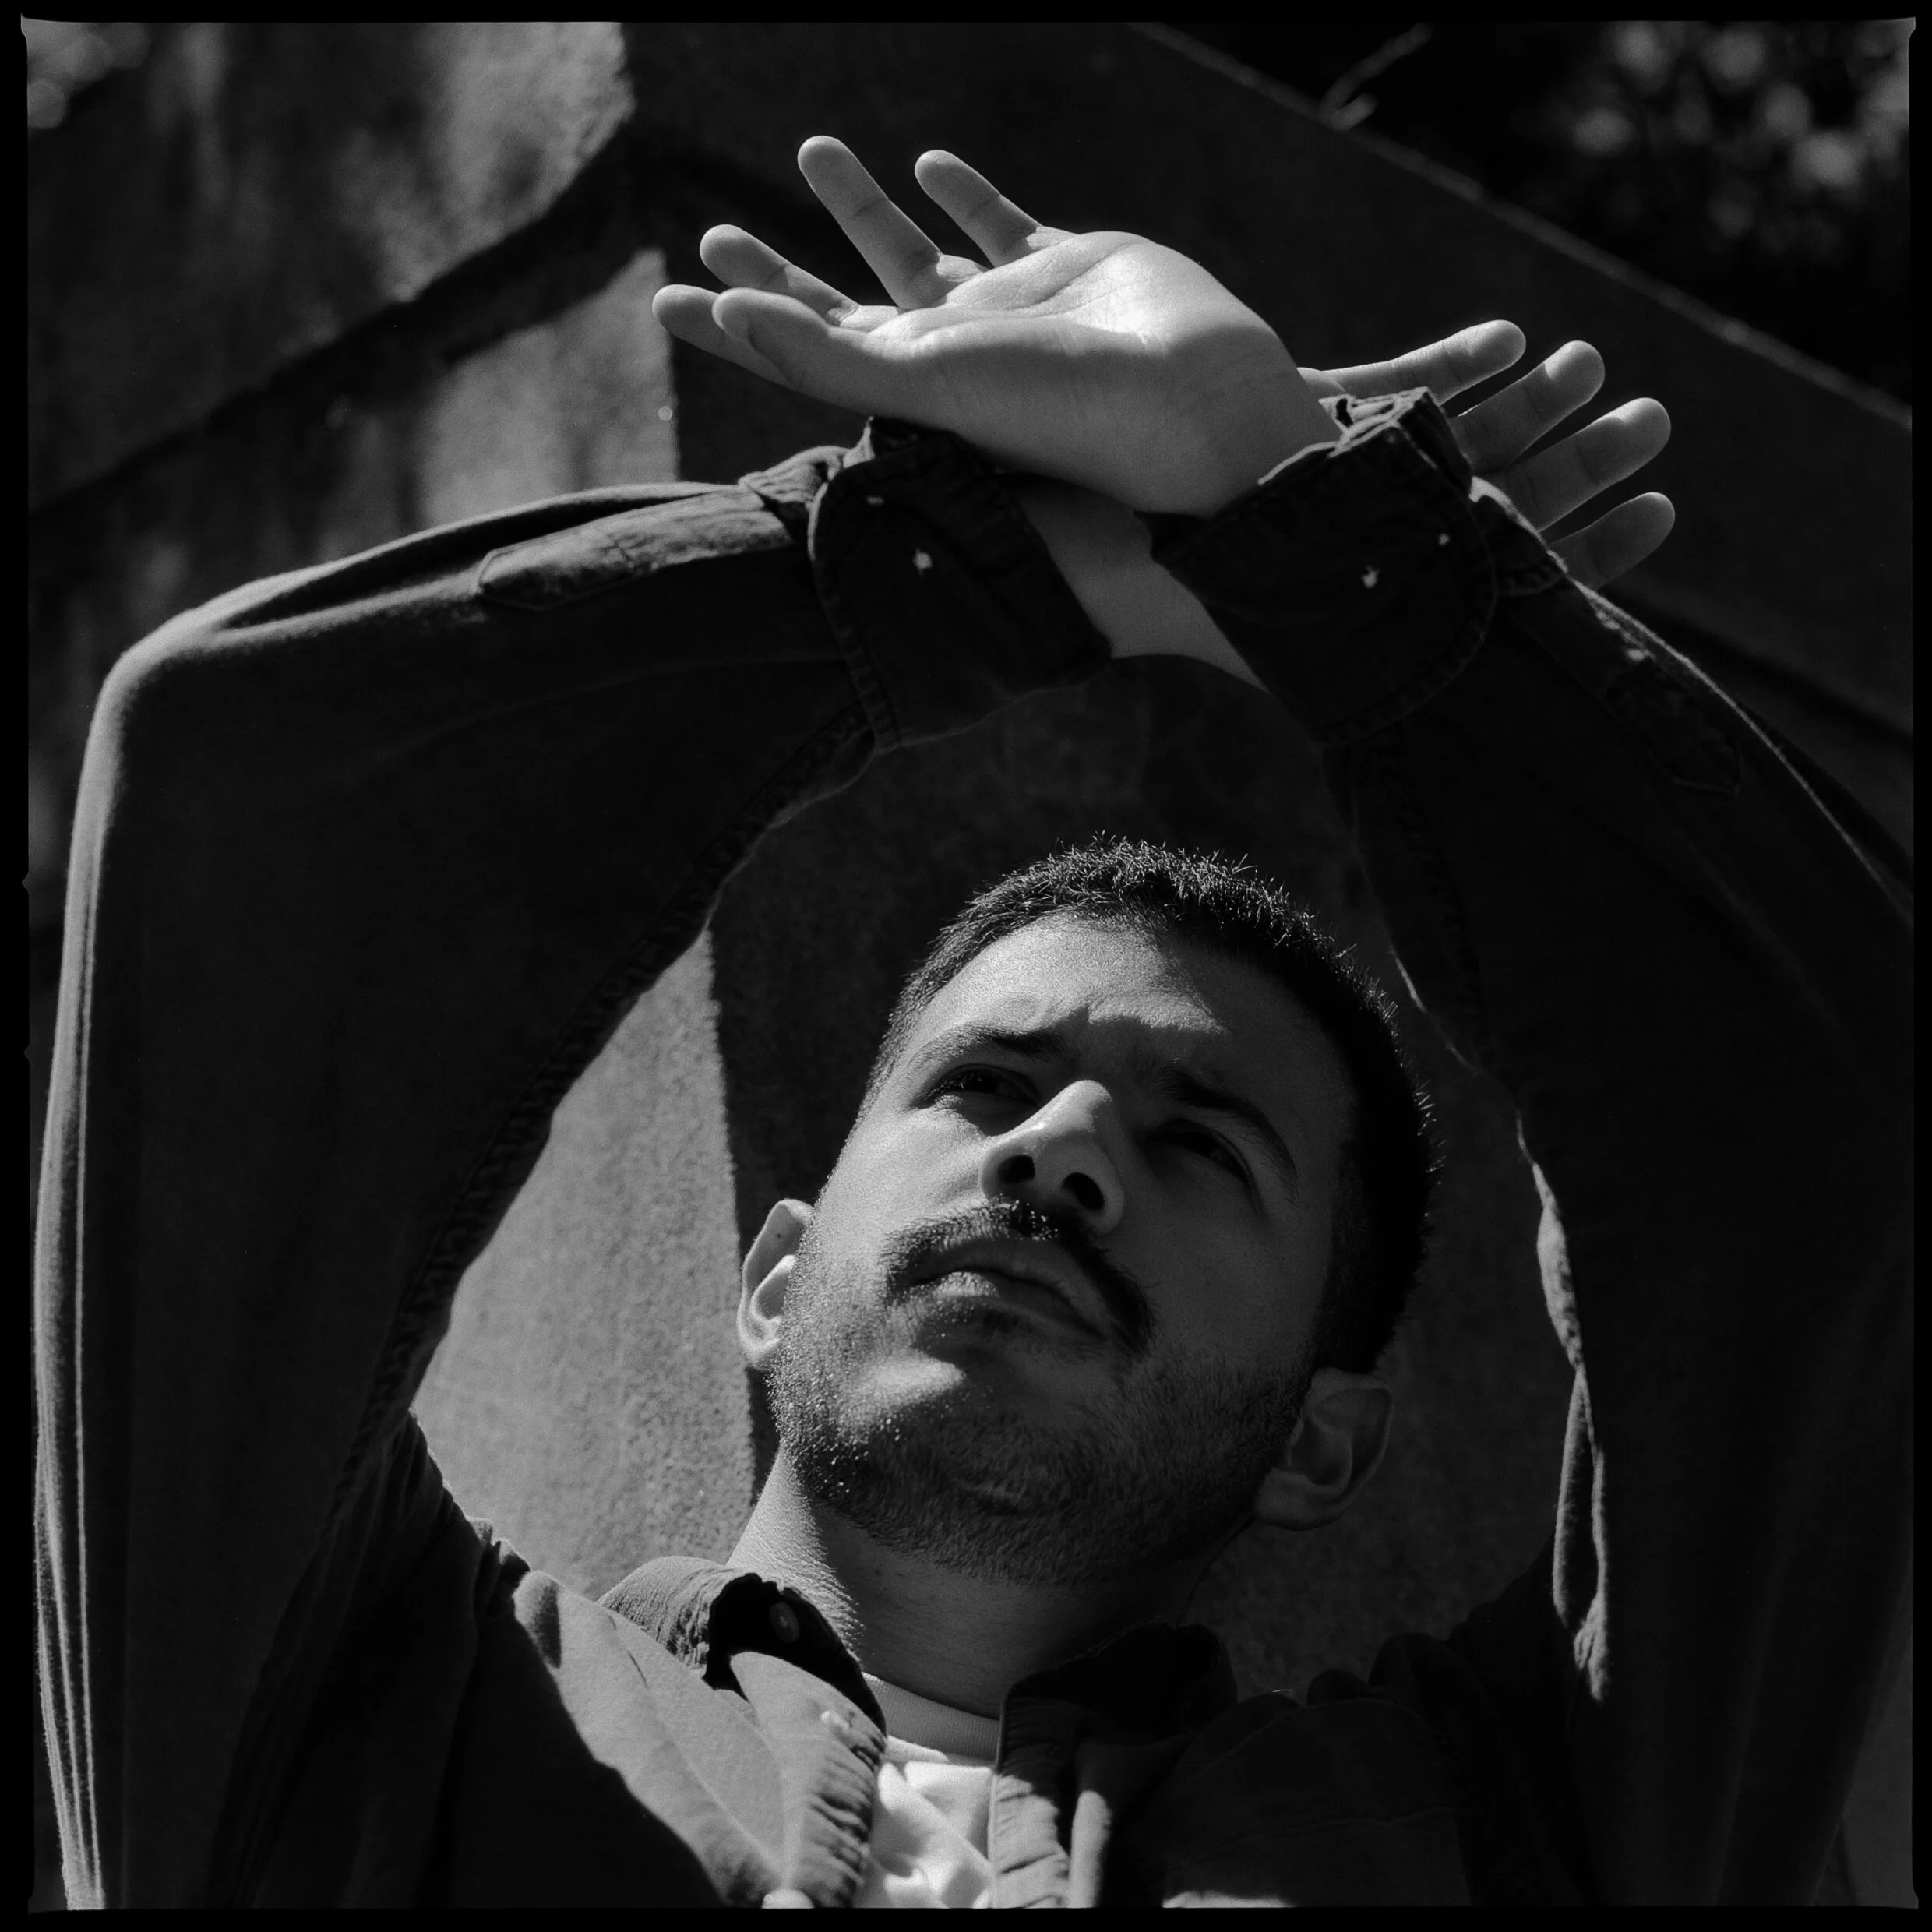
Hello there, it’s been a very long time since my last journal entry. If you’ve read previous entries, I’ve said that I wanted to get back into portraiture and I’ve finally been able to carve out some time to photograph my friend Colin.

Durning the course of my journal hiatus, I’ve been photographing a lot. However, the bulk of images I’ve made pertain to my “Nowhere in Particular” project as well as candid snapshots of my life. And in that time, I realized I hadn’t made time to set up any type of portrait shoot in almost a year. It has definitely been long overdue and I thought it was time to execute this skateboarding portrait series idea I’ve had in the back of my mind.

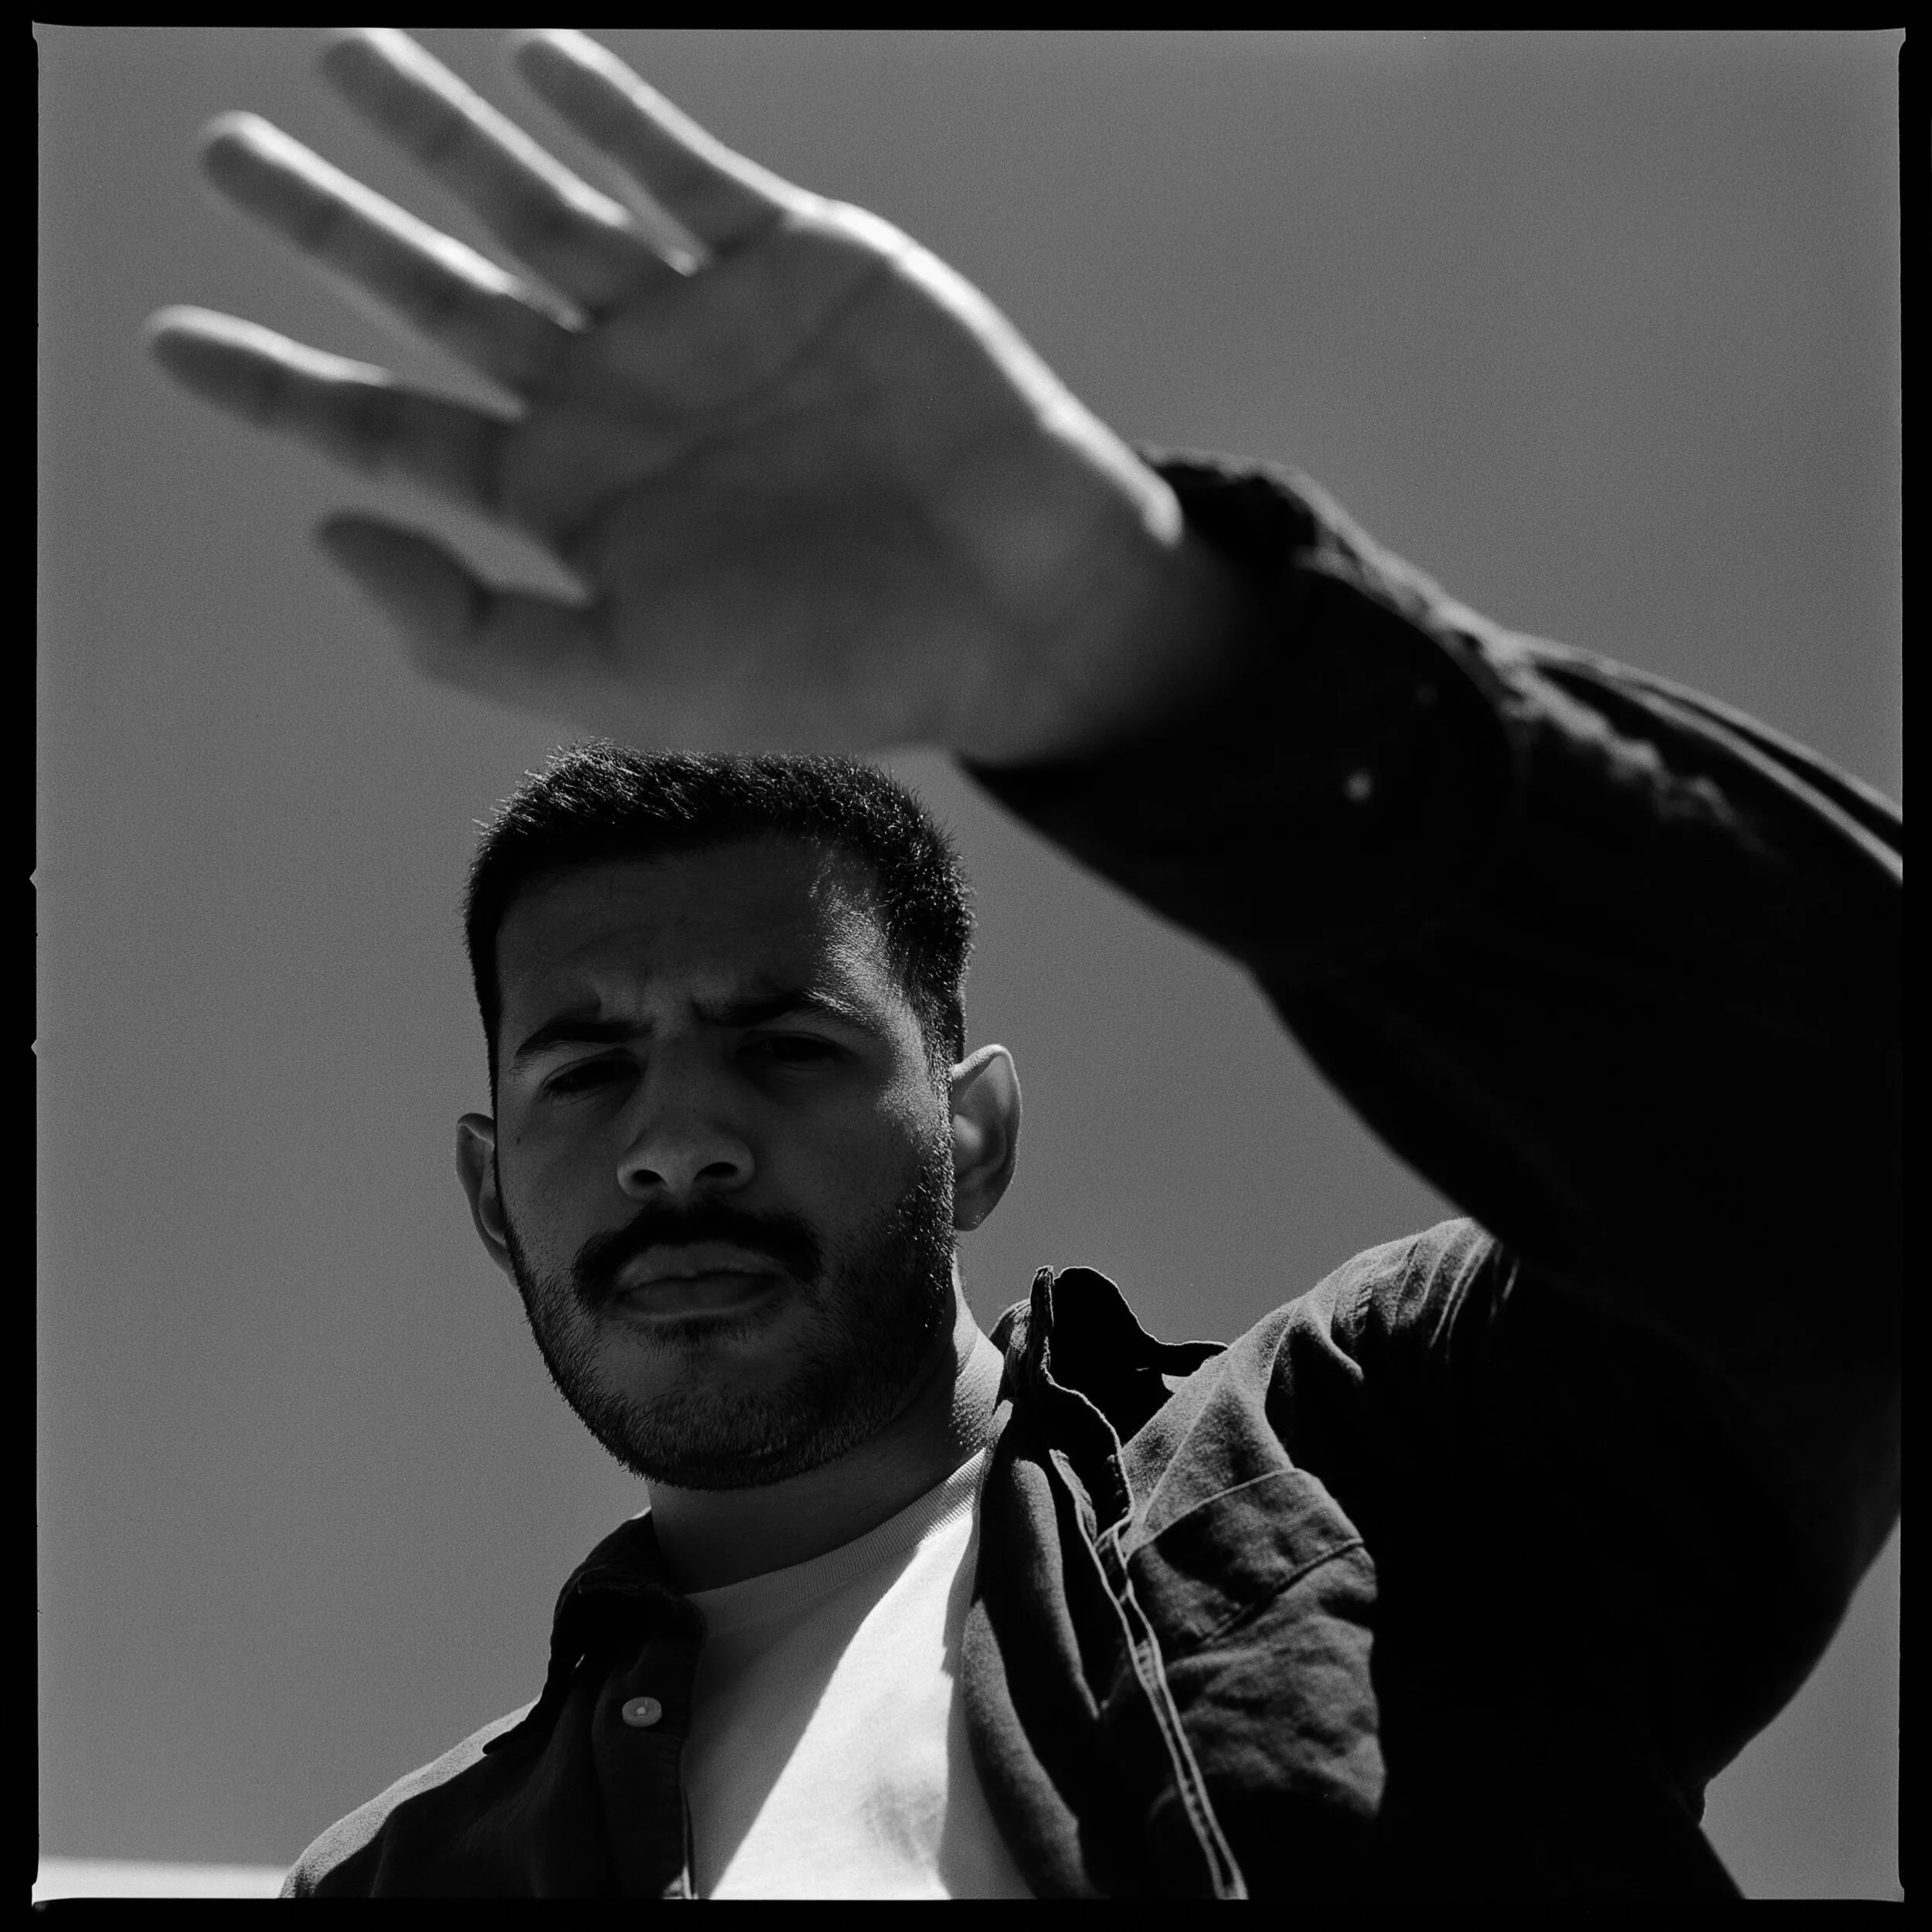
The idea is heavily inspired from skateboard photographers such as Fred Mortagne, Rafael Gonzalez, and Kyle Camarillo. I know this is nothing original, but I thought it would be good practice to direct a shoot again and dust off the Hasselblad. The reason I chose my Hasselblad for this shoot was because of the depth of field I get, even at higher apertures. With 35mm film, I have found that it feels a little too flat and one dimensional for skateboarding and the skater can get lost in the environment. This isn’t to say that it can’t be done with 35mm film, but I feel like the depth of field that 120 film offers, allows for more separation for the style I wanted to make these photos.

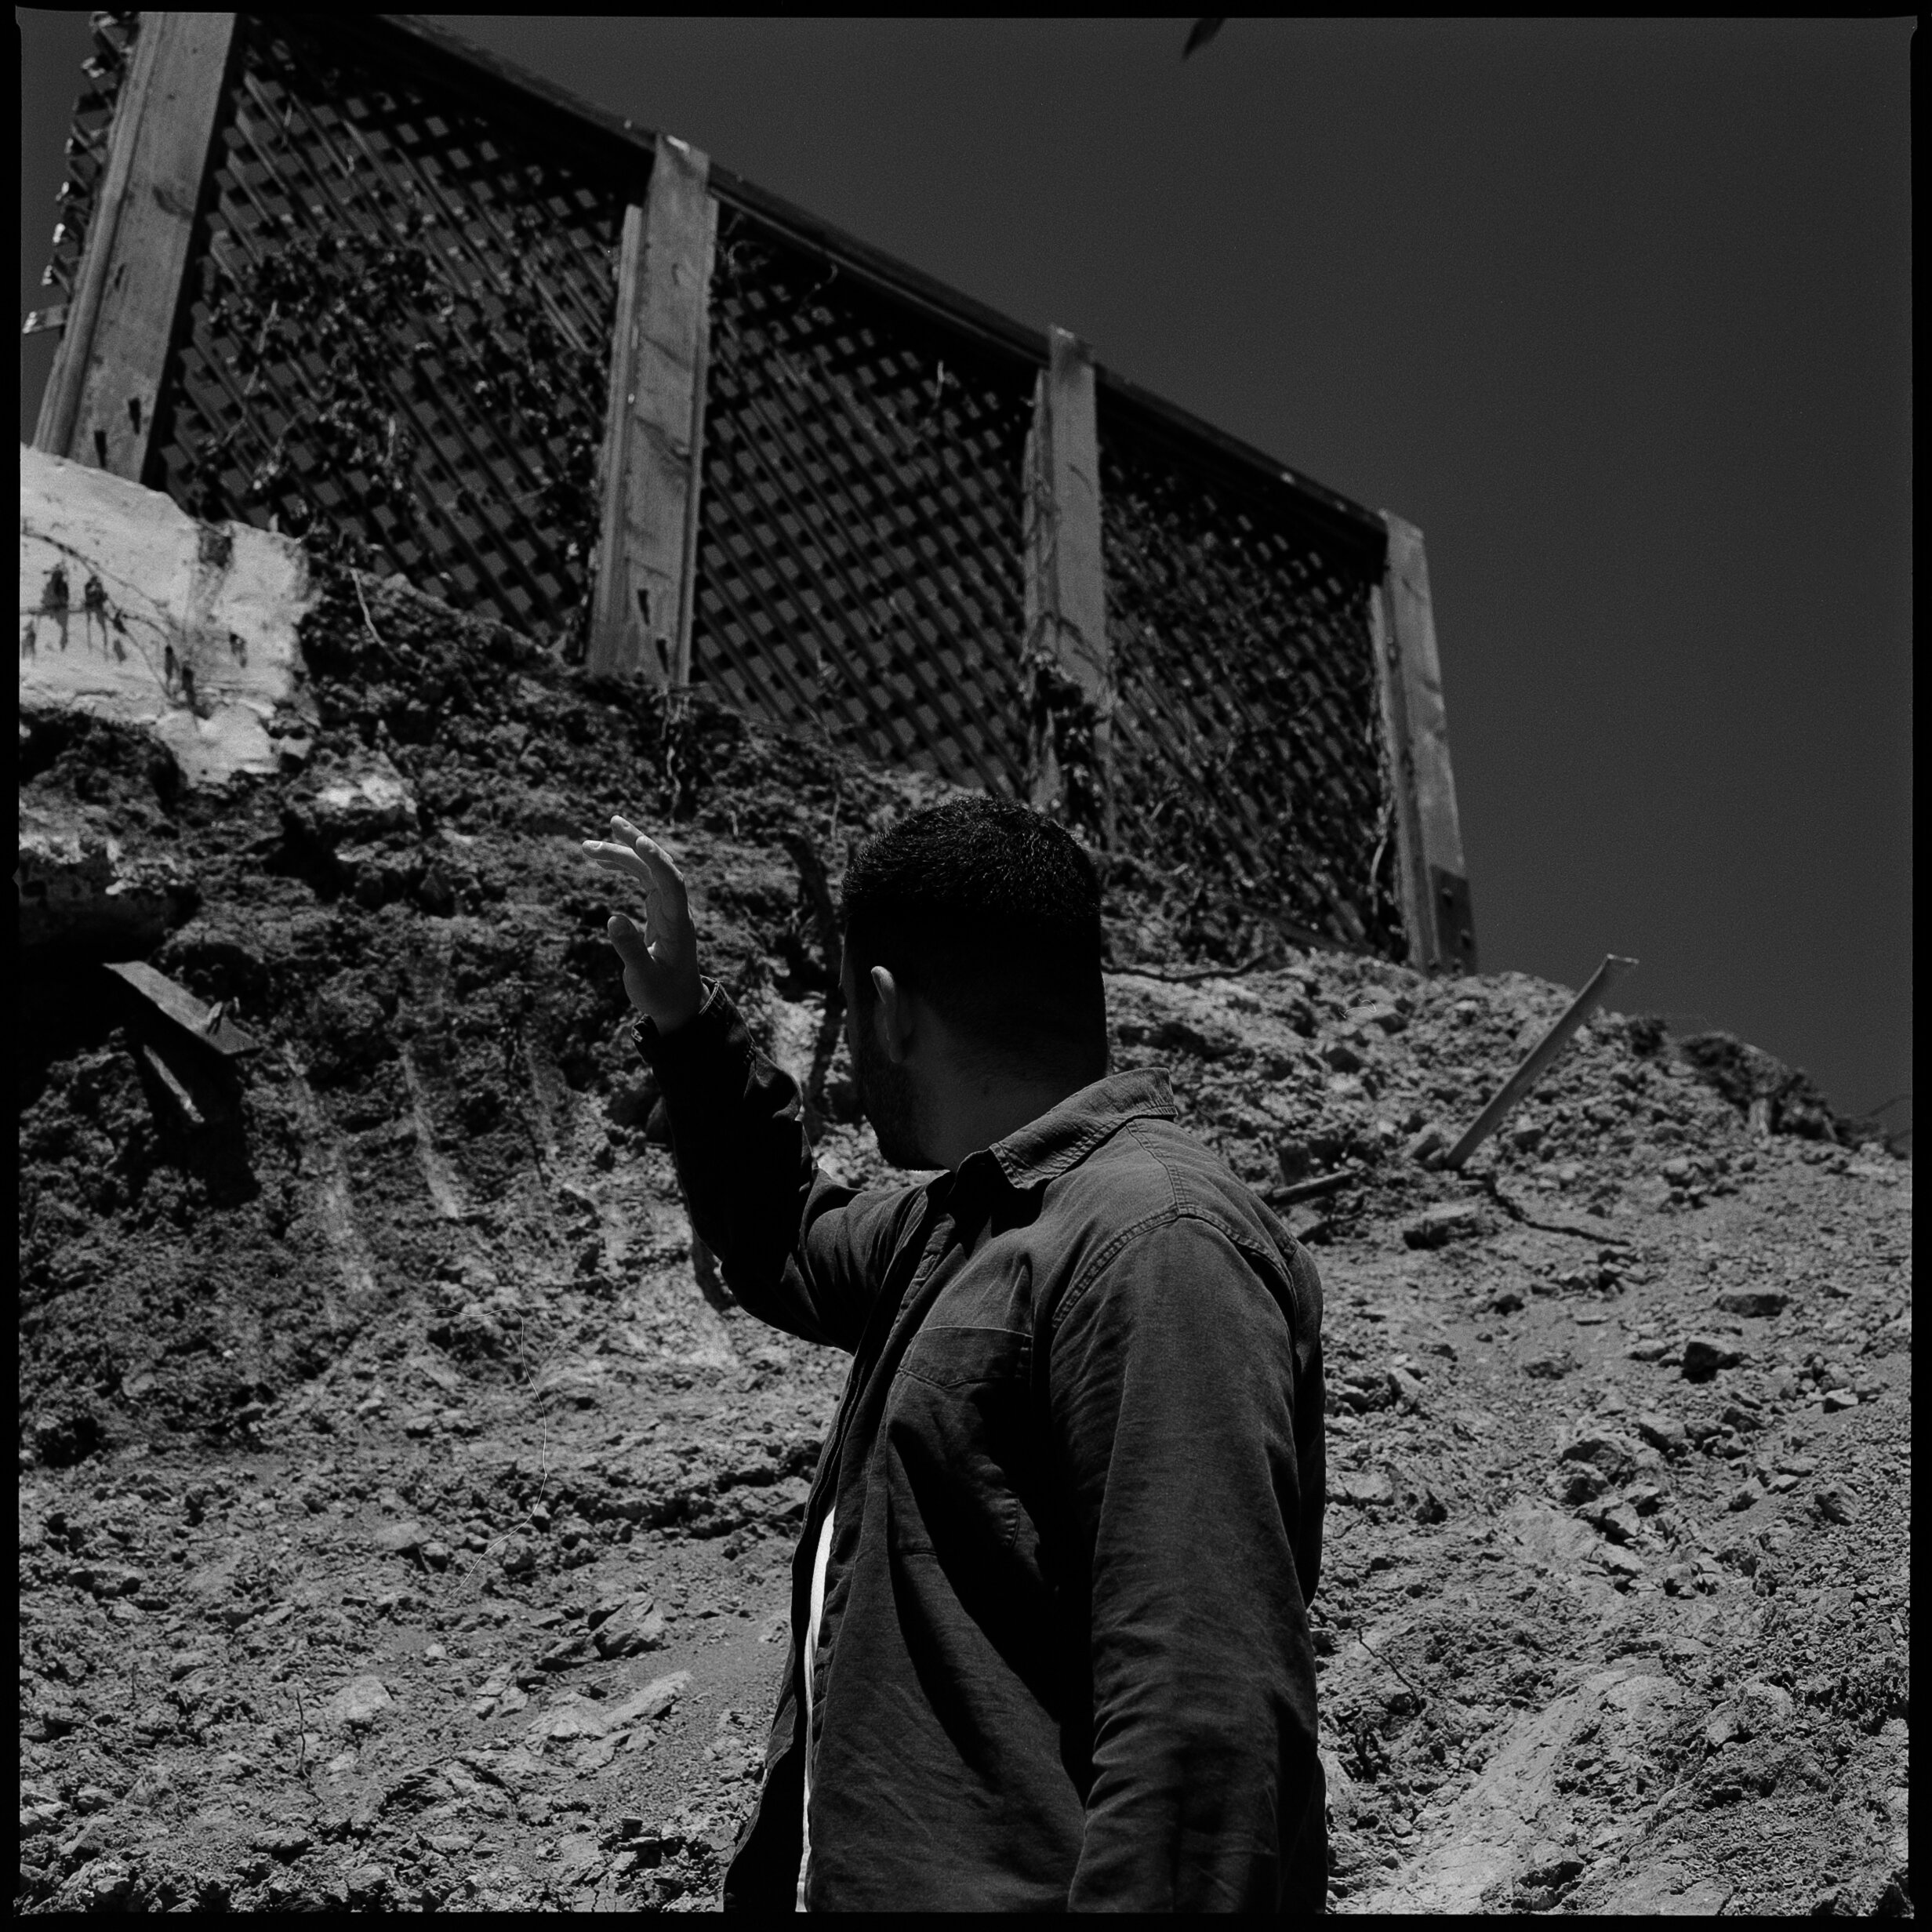
Although I love skateboarding and photography, I don’t really consider myself a skateboard photographer. I wanted to shoot with Colin because he has an explosive yet precise style of skating and is extremely consistent which is perfect for what I had in mind. I wanted to keep these photos as simple as possible: a few portraits mixed in with some environmental flat ground tricks. I wanted these photos to be as if you were a pedestrian or passerby that happened to come across Colin skating throughout the park.

Much like the nature of skateboarding, we started with a loose idea of where to shoot/skate and went with whatever stood out to us. The overall process was great! I started off with some standard portraits and skate photos to get use to the Hasselblad waist level viewfinder again. Once I felt more confident, the rest came easy. The waist level finder worked as a double edged sword for me. On one hand, it let me get close to the ground and utilize lower angles overall, but on the other hand it was more difficult for eye level portraits and double exposures because Colin is much taller than I am. The other challenge was composing each scene using the 6:6 ratio. I had to be much more intentional with each composition. It felt a bit restricting at first as I like utilizing the entire frame. But, I started to realize I was having a much easier time isolating Colin in specific parts of the frame without much distraction from the peripherals. The mix of long and wide focal lengths was fun to experiment with and helped keep my compositions fresh. I’m more than pleased with how these photos turned out and I would hopefully like to continue this series with different skaters. A huge thank you again to Colin for helping me out with this shoot.

Shot on Kodak Tri-X 400 using a Hasselblad 500cm with a 80mm f2.8 Zeiss Planar and a 150mm f4 Zeiss C Sonnar T*.

A few frames- 07.15.2021

Hello! It’s been a while since my last entry mostly due to my lack of motivation to keep up with this journal regularly. But I’ll try to post more on here semi-regularly.

This entry is dedicated to experimenting with colored lens filters for black and white film and payjng attention to color for portraits.

Earlier this month I had the pleasure of photographing my buddy Nick, who is a musician and graphic designer based in SF. I asked to photograph him because I wanted to experiment with colored lens filters for black and white photography and it’s effects in portraiture specifically. Recently, I’ve been inspired by photographer, Jack Davison, who does semi-abstract black and white, as well as color portraiture that have a lot of contrast but utilize light to achieve an almost painterly look. My goal was to see if using colored filters could lead me to a similar result, minus the abstract aspect. I’ve used colored filters before for street candids or for a frame or two but never solely for one project. My go-to black and white color stock is Kodak Tri-X 400, but for this shoot I chose Cinestill BWXX film for its lower speed and it matched the tone I was aiming for. I also have some expired Fuji NPH 400 (circa 2008) that I wanted to use just for fun. I typically don’t use expired film that much anymore due to its inconsistent nature, but for this instance I figured why not?

For this shoot I really wanted to test the effects of the colored filter by using some color theory and color science. For example; yellow, orange, and red filters allow those wavelengths to pass through the lens resulting in those colors being brighter. Whereas complimentary colors such as blues, purples, and greens tend to be darker. I’m not going to go into the science behind it, but this was basically how I got the idea. Then I asked Nick to wear a white shirt and blue-ish button up and I switched between yellow and orange filters to see how the two filters would block out the blue wavelength. As for the color roll, I wanted to think about how I could keep the color palette to a minimum and focus on having the natural, complimentary color of Nick’s skin and shirt pop.

Overall, I’m really happy with the results and I want to experiment more with these color filters and play with colors more on an intentional level for both black and white as well as color film. I feel like there is a lot to learn to really use these techniques to the fullest.

Huge thank you again to Nick for letting me photograph him and testing out these ideas.

Shot on Cinestill BWXX and Fuji NPH 400 using a Hasselblad 500CM with a 80mm f2.8 Zeiss Planar and a 150mm f4 Zeiss C Sonnar T*.

A few frames - 03.12.2021

This entry is on my first portrait shoot since February 2020.

My mindset going into 2020 was to make more portraits. I had a couple things in the works that were really exciting but then 3 months into the new year COVID-19 made its way into the Bay Area and went into lockdown. Thankfully, I was able to make some portraits of my friend Delaney a month before lockdown which she used as the cover art for her 2020 Album “Embodied”. With that being my only portrait shoot of 2020 and the limitations of the lockdown mixed with the fear of contracting COVID-19, I shifted my focus on documenting day to day life and the wild current events that unfolded in 2020. (More on that in a future entry.)

Fast forward to 2021, the world still felt the same level of uncertainty but at the same time we have a better grasp of navigating through it safely. As much as I love making photos on the street and documenting little slices of my life, I felt a little unstimulated and stagnant. The photos felt repetitive, like a motion that I knew the resulting outcome. I wanted to challenge myself again and diving back into portraiture was a good start. Feeling a little more comfortable, I reached out to some homies (shoutout to Cy, Kyle, and Spencer) to get a portrait shoot going.

It had been so long since I had set up a portrait shoot I forgot where to even begin. I knew the first step was looking for an open location away from people and second was deciding what to use for the shoot. Pre-pandemic, locations used to be easy to me. I wouldn’t put too much thought into it or I would keep tabs on places when I was going out. But this time I had to make sure that the location would be safe for everyone and it had to be in an open enough space just to maintain some social distancing. Once I locked the location, I spent a very long (too long) time deciding what film I would use. Making this decision was extremely stressful for me because of a couple things: wanting to experiment and try something new, choosing something familiar and reliable, or use digital as a back up. In previous portrait shoots, I almost always used my digital camera as my main camera and film as my second camera. This was mainly so I could turn photos around quicker for people. After long, headache inducing deliberations with myself, I settled on going the experimental route: Pushed slide film (aka E-6 film).

I had experimented with pushing slide film in the later half of 2020 after listening to photographer Dan Rubin talk about a Garry Winogrand exhibition showcasing his color work by projecting his slides rather than a framed print. He noted that there was more contrast and punchy colors in the projection and was later informed that Garry had pushed his film depending on the situation. I really liked Dan’s results and tried it myself. Most of the photographs I made were slices of life and the occasional street portrait but I had never used it for solely a portrait shoot. The nature of slide film is not as forgiving as color negative (aka C-41) and therefore metering is key.

The day of the shoot was bright and sunny. We met up early in the morning and headed to the location and it was relatively empty. Pretty much the perfect scenario. Even though I had done portrait shoots before, did all this prep work, and researched before hand, I still felt a little unsure of how the photos would translate. With this being my first time using slide film for an actual shoot alongside being out of practice directing people amplified my uncertainty. The concept I pitched to Cy was a cross between the 16mm footage from the skate video Alien Workshop Mindfield (double exposures) and 90’s editorial. The day started off within that mindset but as the shoot progressed I slowly started to deviate from the original concept. In a way, I was getting in my own head and thinking too hard about each frame and putting pressure on myself to stick to the concept even if it wasn’t really working.

In hindsight, some of it did work but I will have to come back to it and refine it a bit more as it resulted in some dud frames. Luckily, Cy’s homie Kyle was wearing an androgynous outfit which was immediately eye catching. At this point of the shoot I was struggling to come up with different compositions for Cy and he suggested I take a couple photos of Kyle too (His outfit was too good not to). So I made a couple frames with Kyle and that instantly got my creative brain fired up again. The last part of the shoot consisted of Cy and Kyle in the frames. Their chemistry in the photos and their contrasting outfits worked really well together. Having Spencer there to hold the reflector and Cy suggesting his Promist filter and Star filter was a huge help! However, I messed up on the metering in the later half of the photos resulting in slightly under exposed/darker images. This was mostly due to the super harsh lighting condition and not wanting to blow out the highlights. But altogether I would say that my first shoot of the year was a success! Not only was I able to dust off my directing and communication skills but I got to experiment and try something new for myself. Plus the collaborative effort that everyone put in made this experience that much more enjoyable. I am definitely excited to plan more shoots this coming year and create more work with talented individuals.

A huge thank you again to Cy, Kyle, and Spencer. I really could not have done it without y’all!

Shot Kodak Ektachrome E100 with a Hasselblad 500CM and a 80mm f2.8 Zeiss Planar.

From the archives - 08.19.2020

This entry is dedicated to one of the most intimidating aspects of street photography: street portraits.

I’m naturally a shy person so street portraits have always been difficult for me. The act of walking up to a complete stranger and asking them for their portrait was completely out of my comfort zone. There have been countless times when I encountered people on the street and felt compelled to take their photo, but would stop myself by making up excuses in my head (ie: “they would probably say no” or “they would probably think I’m weird or creepy” or “I wouldn’t even know what to say”). After the moment of opportunity passes, the thought of “why didn’t I just talk to them?” would linger in the back of my mind and this frustrated me.

Instead of letting myself get discouraged, I decided to challenge myself by slowly engaging more with my surroundings. My goal was to build up my confidence so that I could approach strangers and ask them for their photo. I first started by asking friends of friends in social settings. This allowed me to learn how to talk to someone I wasn’t familiar with, but who also wasn’t a complete stranger. Then I started to gain the confidence to ask strangers. Without the crutch of familiarity, I applied what I had learned from my previous interactions in order to push myself to talk to strangers. There were definitely a lot of no’s but equally as many yes’s.

Over the years, I’ve found that a simple compliment or even being completely transparent with your intentions can go a long way with most people. It makes them feel at ease and they’re more open to the idea of a stranger taking their photo. Sometimes my subjects will let me take their photo and be on their way or sometimes they’ll get excited and will let me direct them. Those experiences usually yield the best portraits. I’ve also learned (if possible) it’s important to give your subjects a copy of their portrait via email or even a physical print. Sharing your work with them gives you the chance to broaden your audience outside of social media/your normal sharing outlets and it makes for a nice gift. The photos below are some of my favorite street portraits and they’re in no particular order.

Shot on various film stocks and various cameras.